Wednesday, March 30, 2011

Nora's 19 Month Update/Trip to Dad's

This month Nora had a lot of firsts! Some of these firsts were not good (her first ear infection, for example), but some of these were awesome - such as her first haircut and trip on an airplane!

We went this past weekend to visit my dad in Nebraska. Rather than driving all day with a toddler, we opted to fly. Nora did really well! The arriving flight she slept about a half hour and then watched some DVD's while WEARING HEADPHONES (try to put headphones on a toddler sometime, I DARE ya.) The returning flight she slept the whole time and did PERFECTLY. I was one very relieved momma.

While we were there Nora enjoyed playing with all the animals at my dad and Barb's house! She also liked playing on all the musical instruments that Dad and Barb have. She ran around a lot while we went shopping, and terrorized everyone at Tractor Supply Company. She enjoyed watching the belly dancers at the Greek restaurant - and dancing along with them. :) It was very cute.

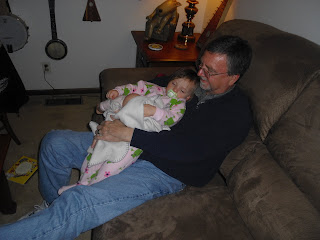
I love this picture of Nora and my dad. :)
All in all the trip went well. While we were there, Nora started saying a new sentence: "Oh nooooooo! What are we gonna dooooooo?" :) It was cracking me up.

Potty training is going much better. Definitely less stressful for me! There have been three or four mornings so far that Nora has been completely dry, and she doesn't give me such a hard time anymore. I attribute this to . . . her learning to flush! lol She LOVES to flush the potty. If I tell her I will let her flush it, she's usually ready to go in a heartbeat. If she starts staying dry for an entire day at a time I told her I will get her some pull-ups. :)

Her teeth are busy coming in - but of course it's still not the teeth you would expect. She has her bottom front two all the way in, and is getting two molars on each side on the bottom. Also a random tooth on the top right is coming in, and I am not really sure which one it is! That's all I can feel right now, but hopefully those two front ones work their way in. Nora actually told me this morning: "Mouth. Owie." Hopefully that means more are coming.

As mentioned earlier, she also had her first ear infection. Her right ear over-produces wax (just like her daddy's) so we have been expecting this. I fully expect tubes by the time she is three, but I will continue to hope it won't be as bad as were are thinking. I think it was a good sign that we didn't have any ear issues on the airplane. We go to the doctor again tomorrow to get them checked out.

That's about it folks! Until next time . . .

Wednesday, March 23, 2011

White Pizza Yummy-ness.

I am not a terrible cook, but I do struggle in my house to find something that Cory (picky), Nora (pickier), and I (not at all picky, but liking some variety) will all eat. Most nights I make at least two different dinners, and Nora's is usually the microwave variety. Hopefully this will change when she gets some more teeth and she can actually eat harder and chewier foods . . .

Anyway, I have been looking for a good "white pizza" recipie for awhile now. Nora likes pizza of all kinds, Cory likes it without a lot of red sauce, and I will eat anything you put in front of me that is edible. I was inspired by a recipie that I saw in a Kraft foods magazine to try my own white pizza. Below is my recipie. It's the first recipie that I made up - or at least the top part of it is. :) To make the crust, I just went online and found a whole wheat pizza crust recipie and threw it in my bread machine. I will likely not use that recipie again, the crust was pretty dry. Anyone know of a better whole wheat crust recipie?

"Leah's White Pizza"


Make crust in bread machine. :)

Sauce:
*8 oz. cream cheese, slightly melted in the microwave
*4-5 Tbsp. cottage cheese
*1 tsp. Penzey's Pizza seasoning
*1/2 tsp. parsley
*1/2 tsp. oregano

Brush crust with olive oil. Top with sauce, 8 oz. mozzarella cheese, and cooked cubed chicken. Bake for 9-11 minuites. Sprinkle with parsley before serving. Enjoy the yummy-ness!!

Until next time . . .

Sunday, March 20, 2011

New Command Center

I made a new Command Center (a place for organizing my calendar, to-do lists, coupons, bills, mail, etc.) not too long ago, if you remember. There was nothing really wrong with it, but it did not do what I intended it to - which was to get rid of the piles on my counter. The old one had no place for coupons or bills, and the hubs still put his stuff on the counter in his hat from time to time (which makes me nuts.)

Not anymore!

This past week I started work on this new-and-improved Command Center (that actually does all that I hoped it would! YAY!) I went bargain shopping one day and picked up a set of stick-on-the-wall dry-erase panels at Target on sale. I decided to use them as the basis for the new Command Center. I picked up a cookie sheet at the dollar store,and spray painted it black to make a magnetic board. I also picked up a huge black canvas organizer at Wal-Mart on clearance. Finally, I covered a piece of cardboard with fabric, glued on some pockets, and framed it to organize the little things. I also used some labels I bought on clearance at a craft store to label the pockets, and used a vinyl decal that I had to fill in the gap to make this whole thing even-looking. Total cost for the new Command Center? Under 20 bucks!

Framed fabric with glued-on pockets:


The Wal-Mart canvas organizer:


Magnetic cookie sheet and one of the stick-on panels:


The whole thing was partially inspired by this Command Center that I saw recently. Delightful Order is a wonderful blog - the organizing makes me both jealous and happy all at the same time!

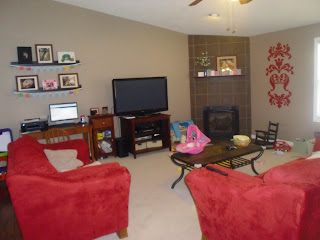
I have a few other Pottery Barn-inspired decoration ideas for this wall, but for now I am going to see how this works. I was very worried while making this how stick-on graphics would work on the wall since it's heavily textured. I discovered that the more glossy the graphic, the more noticeable the bumps are. For example, last week I also put up a GIGANTIC Uppercase Living decal in my living room that I purchased about six months ago and never put up. It's not glossy at all, and looks perfect - almost like it was painted on. I really like it! Goes good with my red couches. :)


Please don't mind the mess, I did not clean up for this shot AT ALL. Oopsie.

And back toward the kitchen, for a shot of the Command Center and my table with my new framed "art":

I saw the fabric in this photo at Wal-Mart and wanted to include it in my spring decor. I ended up just framing it and hanging it above my table. I don't think it looks quite right, but I will probably just leave it for now. This wall is so hard to decorate. Either way, now I get to joke about the "art" on our wall. :)

Until next time . . .

PB Inspired Curtain

Hey folks, sorry for the long blog absence. I have been working on various projects all at the same time and trying to stay off the Internet. Plus, our daughter had an ear infection and is of course still potty training. Also, we have been outside!! The weather has been very nice in my neck of the woods, and our entire neighborhood "wakes up" when the weather gets warmer. Anyway, I will be sharing the projects that I have been working on this week in several posts, this being the first!

LOVED these drapes over at Pottery Barn as soon as I saw them in the catalog. At least I am pretty sure it was those curtains - the ones I saw were way shorter and pictured on what was probably a kitchen window with dark rods and dark clips. BUT I don't have my PB catalog anymore so I can't be sure. All I have is this little scrap from the catalog with a picture of the curtains:


I happened to have similar fabric already from a recent trip to the fabric store on date night. I sewed one panel for the actual curtain, and a few days later I sewed a "background" curtain to better block the sun from coming in that window in the morning. I used fabric that I picked up from a local flea market last Christmas to make the background panel. For the rod I used a magnetic curtain rod that I already had. It was a metallic gold, so it took a lot of paint to make it dark. The rings were five bucks at Target.


I am really pleased with how it turned out. It's good-looking and very functional. I love the dark rings and rod with the fabric. Plus it took virtually no time to sew, and my finicky sewing machine usually has no trouble with a straight stitch anyway. I probably didn't even need to really sew this, but I wanted it to look right. I even hand-stitched the background panel to the front panel in strategic places.

Do-it-yourself PB curtains for less than 10 bucks? Yes please! :)

Until next time . . .

untitled

Monday, March 14, 2011

Spring Decor

WHAT IS UP WITH THE SNOW??!! We definitely had a surprise snow in my area today. It was such a surprise that USA Today posted an article that I read earlier on my iPad about how big of a shocker it was. I am just ready for some warmth.

SO, in order to help the snow melt faster, I decided that it's time: time to get out the spring decorations! All three of them. :) I am not a fan of pastel colors, so I really haven't bought a lot of spring things in my life. I can deal with dark pastel colors, and I also like "spring green". I decided to run with what I had on hand (as usual) and not buy anything new. (I also had a lot of crafting time today with my daughter being gone at my mom's for the night - I got so much done!)


Simple, functional table top. Seriously, someone needs to give me a centerpiece lesson . . . Anyway, the placemats were $1 each at Michael's - score! I may change my table-top set-up soon if I can think of something else, but I like it for now. I prefer function over decoration when it comes to my table - the kids around here mess it up too quickly!


I added a "Spring Tree" to my mantel. You will notice it's the exact same "Thanksgiving Tree" from thanksgiving, minus the fall colors and with some spring leaves and spring ornaments.


And lastly, a pair of pennant banners. Can you believe I have never made one of these before??!! Seriously, it's like the one thing every crafty person makes at some point. It's probably the first thing everyone makes when they get a Cricut or Silhouette machine - which is probably why I haven't made one up until now. I just used good drafting tools and letter stickers. Also, some spring post-it notes. :)


A close-up. Aren't my photo-taking skills amazing?? . . . OK, stop laughing.

Getting the decor out worked folks - the snow is melting already!! ;)

Until next time . . .

The DIY Show Off

Sunday, March 13, 2011

Potty Training/Foot Rest

I almost titled this entry: Potty Training (and other "stools" of note.) I couldn't bring myself to do it though. EW. You're welcome.

Nora has started potty training. She's doing really well . . . but it has been exhausting for me! She doesn't like anything bathroom/diaper/potty-related, so it's hard to get her excited. I have to do everything I can to get her to even go IN the bathroom.

BUT - this week there have been two major successes. ONE - we were able to get her to sit on the potty again after she was flat out refusing for a week now. TWO - she went number two! YESSSSSSSSS!! That was something I definitely didn't expect to see for a few months yet . . . even though I am fairly sure based on her reaction to it that she will NEVER do that again. Luckily I don't expect my 18-month-old to conquer potty training in a day. She will get there when she gets there.

Anywho, even though I am dog-tired I would like to show you what I did with the other footstool. I just covered the original fabric and stuffing with new fabric, and Magic Eraser-ed off the rose decal on the front, so changing it took about 20 minutes total. Not a huge project, but I am changing it someday anyway. Plus I LOVE THIS FABRIC! I have been wanting to use it for something for awhile now.

BEFORE:


AFTER:

Simple. And I love it! The fabric is not the same shade as our red couches, but I threw it in the living room in front of our loveseat anyway. I may change the location, but I like it where it is for now.

That's about it folks! Now I am going to bed. Up next: Pottery Barn knock-off curtains . . . I hope. If I can get my sewing machine to work, and my daughter to like her potty just a VERY LITTLE BIT.

Until next time . . .

Thursday, March 10, 2011

Mud Room Storage

This past weekend I went to Kidmania, a gigantic kid's yard sale. It is always a ZOO!! So this year, my MIL and I got VIP tickets. That meant that we got to go in an hour before the crowd and get first dibs. It. Was. Awesome. I got the best haul EVER:

*baby swing
*little tykes kids picnic table
*dollhouse with TONS of accessories
*fold-up easel with a stool
*babydoll carseat
*cabbage patch kid
*"cat house" (as opposed to a dog house) with 4 stuffed kitties in it (25 cents for it! Awesome!)
*2 sesame street toys
*bunny slippers
*kids lawn mower with little "gas can"
*John Deere rocking horse for my sister and her husband when the time comes
*table top high chair
*Skip Hop diaper bag

I paid about $100 for all that, and most of it looked new or barely used. IT ROCKED! "Buy used, save the difference!"

Another unexpected gem that I picked up was a little white 3-drawer dresser for 5 bucks. (Aplogies for no "before" picture.) It was in moderate condition, and had obvioulsy been previously used for baby storage of some kind. It was cheaper than cheap and a little rickety, but as soon as I saw it I knew it would be perfect for craft storage in our mud room.

So I picked it up, and my MIL and I loaded it into the truck (yes, truck. Did you see the above list??) It sat in my garage for a whole day before I started reinforcing it with nails, and painting it to match the mudroom.

TA-DA!


All it took was the paint and the same drawer pulls we have on the counter cabinet to make the thing look like it belonged. And it already has been a great organizational tool - I was able to get all my craft stuff officially OUT of the spare bedroom. :) More than half of it is downstairs, and the most used items (glue gun, stamps, photo cutters, etc.) are in this little dresser.

Good deals and simple fixes like this make me so happy. :)

Until next time . . .

Wednesday, March 9, 2011

Book Nook Seat

My Grandma gave my mom some thrift store stools not too long ago. My mom didn't have too much use for them, so she asked me if I wanted them.

Not really my style, but I have always wanted to re-upholster something. So I thought I would give it a try. Plus, Nora really enjoys sitting and climbing on them. :)

Since there were two stools, I thought I could use one in each child's room and match it to their individual book sling. Since I currently only have one child, only one got done this weekend! The other stool and the other book sling will get done later in life. Or I may upholster the other stool to match my living room for now, and then re-upholster it again in a few years for the next child. We shall see!


It was easier than I thought and harder than I thought. I wanted a huge cushion for it, so I used a cut-up garden mat from the dollar store AND also used foam padding. I just wrapped fabric around it, and stapled. I also made a foam-board covered interior to cover the staples, that I may do differently next time because I didn't quite cut it right. I also toyed with the idea of painting the wood, but I decided against it. The wood was in excellent condition, and matched Nora's furniture well.


All in all, it makes a cute little addition to her "reading nook". Nora likes that she can open and close it, and enjoys sitting on it. I like that it's totally cute and functional. YAY!!

Until next time . . .

Linked up at

Thursday, March 3, 2011

Nora's First Haircut

Getting a haircut is not easy for me. I go through "hair remorse" like you wouldn't believe. It's one of the may ways I am crazy quirky. ;) And I found out recently that I am not much better about Nora's hair.

So when the time came to get Nora's first haircut, I thought it might be easier on all of us to try this place. It was a bit of a drive, but I heard a few good things about it and I thought it would be worth it (it was.)

The place is pretty neat. Nora got sit sit in an elevated Barbie Jeep and watch "Elmo in Grouchland". Watching a movie did not deter her from being wiggly, but she did OK.


She didn't cry at all (I didn't either, if you want to know) but she also did not want this lady to touch her and kept trying to move her head. The stylist was very worried that she wasn't cutting straight. In the end, it all worked out.

We got the "First Time Haircut" package, which included a picture and a cute picture frame. She wouldn't smile at the camera, but she was pretty happy to be done. :)


This is the best pic I could get of the cut today. Someone's not in a picture-taking mood. ;)
Until next time . . .

Tuesday, March 1, 2011

My Dream Date

This Saturday Cory and I found ourselves without Nora, and with a tax return check that we have been trying not to spend. So on the way to drop Nora off, Cory asks me: "What would you like to do tonight?" And, being me, I sighed and said in my dreamiest voice: . . . .

. . . "Fabric store."

In the town where I live, there are no fabric stores, unless you count Wal-Mart. Wal-Mart has some good stuff, but it's usually not really what I am looking for. This is all OK because if I had the chance I would likely buy lots of fabric, and then just look at it. I have a frustratingly finicky sewing machine. My fabric projects involve glue and staples most of the time.

Anyway, I had been wanting fabric for various projects for awhile now, and we actually had time and money for it, so I thought I would just do my best with my crazy sewing machine . . . FABRIC STORE!

We also went out to eat at a great steak place, and attempted to see a movie too, FYI. I am not a total dud on a Saturday night. :)

While shopping for fabric I saw some that instantly reminded me of Nora, and I picked up a yard. It was white flannel with different colored kitties all over it. I had no idea what I was going to make her with this fabric, but later I decided to make her a couple of kitty throw pillows.

. . . Which turned into ONE kitty pillow. My sewing machine frustrated me to the point where I made a lot of mistakes and some of the fabric got ruined. I used an entire yard of fabric for one small pillow:


You can't see it in the picture, but the stitching is not good. There was also supposed to be contrast stitching, and two small baby kitty pillows in my original plan. Instead there is just this. She likes it anyway, but it's not really what I wanted to do for her.

I think it's time to call in the sewing machine repair folks. Anyone know of a place that does it?

Until next time . . .